I have wrote about
how to make a blog with blogger.com. Now, i want to share
how to setting your blogger blog. It is the important step, and you must take care for this one.
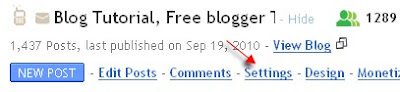
First, of course you need to log in into your blogger dashboard. When you have logged into your dashboard, click “Setting” links. When you have clicked it you will see setting tab in your screen. There are “Basic”, “Publishing”, “Formatting”, “Comments”, “Archiving”, “Site Feed”, “Email & Mobile”, “Open ID”, and “Permissions”.
* You will see the menu tabs containing things to setup:
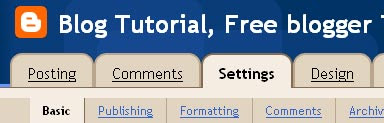
Basic
Some settings in
Basic menu:
- Blog Tools: Import blog → this is the facility to import data from your computer (this is usually done when transferring blog). Don’t click it, let it be as it is. Export blog > this is the facility to export blog from blogger server to your computer. This facility is also called as Backup blog facility. You are suggested to create blog backup at least once a week. The backup data will be useful and helpful when sometime you want to transfer blogs in blogger, or you also can use it when you want to do a blog migration from blogger to another blog machine such as Wordpress, etc. Delete blog > this facility is to delete your blog. Don’t ever click it if you don’t want to delete your blog.
- Title: Fill out with the title of your blog, e.g. My personal blog
- Description: Fill out with your blog description, e.g. Notes of My Unique Life.
- Add your blog to our listing?: You’re suggested to choose Yes option.
- Let search engines find your blog?: Choose Yes, so your blog will be indexed by search engines such as Google, Yahoo, and Bing.
- Show quick editing on your blog?: You may choose Yes or No.
- Show email post links?: It will be an icon of email with which your visitors can easily email your posts to their friends. Choose Yes, if you want, or No if you don’t want this facility to appear on your blog.
- Adult contents?: If your blog then will contain anything about adults including in the forms of writing, images, or videos of such as sexy girls, etc, you can choose Yes. However, if your blog then will contain anything to be accessed safely by kids and all ages, you should choose No. NB: If you choose Yes, there will be an adult content warning when your blog is accessed.
- Select Post Editor: This is to select post editor in your blog. Updated Editor → This is the latest post editor that Blogger has with new features included such as the More button to cut off your articles, and more. Old Editor → This is the old post editor that Blogger has, but you can still use it if you feel more comfortable with this old editor, because there are some features at this old editor that are not included in the Updated Post Editor. Hide Compose Mode → This is an option for those who are familiar with HTML because this option will hide the compose mode in your post editor. Don’t use this option if you are not familiar with the HTML coding.
- Enable transliteration?: Select Enable if you want your post editor allow you to translate to Hindi, Kannada, Malayalam, Tamil, or Telugu. Select disable if you want your post editor not to allow you the transliteration.
- End settings on Basic menu by clicking SAVE SETTINGS.
Publishing
This is to change the domain name of your blog in blogger with your own domain name, e.g. http://yourblogname.blogspot.com into http://yourblogname.com.
For temporary, don’t do anything at this Publishing menu!
Tutorial about custom domain in blogger can be read at How to use Custom Domain in Blogger.
Formatting
Some settings in the Formatting menu:
- Show at most: type the number of posts you want to display on your blog homepage, e.g. 5. Next to number of posts option, there is dropdown menu allow you to choose Posts or Days. Just choose posts, which means your blog homepage will show 5 posts.
- Date Header Format: Choose how the date format you would like to display above your posts.
- Archive Index Date Format: Choose the date format for your archive index.
- Timestamp Format: Choose the time format you would like to display. This is the time when a post is published on your blog.
- Time Zone: Just choose the time zone where you are.
- Language: Choose the language you want to use in your blog.
- Convert line breaks: this is the facility of automated line breaks when you hit enter during typing an article in the post editor. This facility is used when you think you will not post or write the codes such as HTML codes, etc in the future. But if you think you will post about HTML codes and include the codes in your posts, you should choose No, for instance, if your blog talks about the tutorials about HTML, PHP, etc.
- Show Title Field: You may choose Yes or No.
- Show link fields: You may choose Yes or No.
- Enable Float alignment: Choose Yes, so you can arrange the position of your post both images and texts. But if you think this option will disturb the display of your blog, just choose No.
- Post Template: This is the facility to create any text or code to appear each time you write a new post. It is usually used to create blog signature that will always appear in every post you create without having to type manually each time you create a new post.
- End the settings on Formatting menu by clicking SAVE SETTINGS
Comments
Some settings in the Comments menu
:
- Comments: Choose Show if you want your posts commented by your visitors, or choose Hide if you don’t want your posts commented by your visitors.
- Who can comment? : Anyone – includes anonymous users → choose this option if you want everyone can comment on your blog including the Anonymous users or those without identity. Registered users –includes OpenID → Only users that are registered who can comment on your blog, i.e. those who have accounts in Google, Live Journal, Wordpress, Type pad, AIM, and or OpenID. Users with Google accounts → Those who can comment on your blog are those who have Google accounts. Only members of this blog → Only members of your blog who can comment. A certain community usually chooses this option such as educational community, etc.
- Comment form placement: Full page → the page of your blog will switch to the comment form page if you choose this option. Pop-up window → your comment box will appear as pop-up window, so your blog is still displayed. Embedded below post → your comment box will directly be displayed under post, so your visitors can comment directly without clicking a Post Comment link. Bloggers like most the comment box is embedded below post.
- Comments Default for posts: Choose New posts Have Comments if you want your articles have the comment box, but you can disable this when you create a post. Choose New Posts Do not have comments if you want your posts don’t have comment box, but you can add it when you create a post.
- Backlinks: Choose Show if you want to display links to the websites that link to your articles.
- Backlinks Default for Posts: choose New posts have backlinks if you want your articles have backlinks, and choose new posts do not have backlinks if you want your articles do not have backlinks.
- Comment Timestamp Format: choose the date format you want to display.
- Comment Form Message: type your massages to be displayed above the comment box, e.g. please comment freely but keep it polite by not doing spam.
- Comment Moderation: choose Always if you want to display any comment after moderation. Only on posts older than …days. Choose this option if you want to display any comment on your selected posts based on the age you have determined, e.g. 15 days, etc. Choose Never if you want to display any comment without a moderation. Don’t forget to type your email address in the available field to get notifications when someone of non-member comments on your posts. Or leave blank if you don’t need the notifications.
- Show word verification for comments?: choose Yes if you want to display word verification that will require commentators to enter before publishing their comments. It is to avoid a spam comment such as the robot spam script that can comment on your automatically and frequently. Anyway, visitors usually don’t like the word verification for inconvenience reason. Choose No when you don’t want the word verification displayed, although this option allows spasm like robot spam scripts to place their comments.
- Show profile images on comments?: Choose Yes if you want the profile images of commentators to be displayed, and choose No if otherwise.
- Comment Notification Email: Enter the email addresses up to ten emails that you want to send comment notifications.
- End settings on Comment menu by clicking SAVE SETTINGS.
Archiving
Some settings on
Archiving menu:
- Archive frequency: choose how your blog archives will be displayed on your blog whether you want the archives arranged No Archive, Daily, Weekly, or Monthly. You had better choose Monthly.
- Enable Post Pages?: Choose Yes or No.
- End settings on Archiving menu by clicking SAVE SETTINGS.
Site Feed
Some settings on
Site Feed menu:
- Allow Blog Feeds: Choose either None, Short, or Full. You had better Full at this option.
- Post Feed Redirect URL: If you have burned your post feed, you can type the URL of your feed here, for instance, you can burned post feed at Feedburner, etc. Leave it blank if you don’t have. We will specifically discuss about Feed burner at next post.
- Post Feed Footer: You can fill any code here that will be displayed in the footer of your post feed such as advertisements, etc. Leave it blank if you don’t understand.
- End settings on Site Feed menu by clicking SAVE SETTINGS.
Email & Mobile
In order to be able to post an article on your blog, not only do you use the post editor, but you also have other ways, e.g. through
email and
mobile.
Some setting on
Email & Mobile menu:
BlogSend Address: Type email addresses up to ten emails separated by comma (,) to which you want to send notification when posting an article.
Email Posting Address: Create a blogger email address (known as Mail2Blogger) from which you can post articles directly to your blog when you send an email to this blogger email address, e.g. if you have an email address at example@gmail.com, then you can create blogger email address at example.post@blogger.com or example.blog@blogger.com, or anything else you think very good, but you should remember that it’s a secret to avoid other people can post through it.
To activate this feature, you should choose
Publish emails immediately, meaning that each time you send emails to your blogger email address, the content of your email will be posted as blog post on your blog. If you choose
Save emails as draft posts, the emails will not be published automatically but will be stored in the draft posts.
However, if you don’t want to publish through email, choose
Disable. For security reason, many choose this option.
End settings on
Email & Mobile menu by clicking SAVE SETTINGS
OpenID
Nothing to do some settings here, but there is notification telling you that your blog address can be used as the address of OpenID. What is OpenID? Maybe we will discuss later.
Permissions
On this menu, you can add Authors by inviting them. Just write the email addresses you want them to be the authors of your blog.
At
Who can view this blog?, you can choose who can view your blog. If you choose Anybody, your blog can be viewed by public or anybody. If you choose Only people I choose, only invited people who can view your blog that they should login first to view. If you choose Only blog authors, only your blog authors who can view your blog. If you think your blog is not worth publishing as you conduct maintenance, for instance, you can use this option, so only you that can view the blog.
For our discussion on
How to do blog settings in blogger seems to come to an end, so what do you think about this?


